Showing posts with label tutorial. Show all posts

Monday, August 2, 2010

Fridge Flair Magnets Tutorial: Step Two - Put It Together

So as you can see I've set everything out on a paper towel. On top of an old cookie sheet. It just makes clean-up easier. One thing to know about resin if you've never worked with it: if you don't clean it up before it hardens, it's there for good.

Today I'll be filling in some pendants, a bracelet and some bottle caps. I used regular floral cardstock for the inside spaces of the bracelet and pendants. I just traced the outline, cut it to fit and glued each piece in place.

I snagged some robot stickers this weekend and will be making these into magnets. I used my 1" circle punch on some old scrap cardstock and slapped a robot sticker to it. I then glued that to the inside of the cap. I also waited 24 hours for the glue to dry before I added the glitter inside the rim.

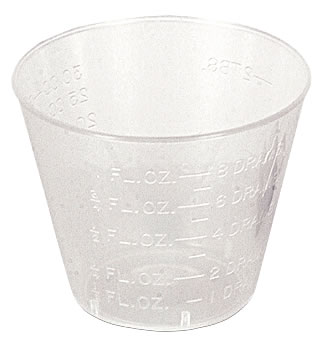
Since I didn't have a large amount of stuff to finish, I made a small batch of resin with my little plastic measuring cup. It was perfect. I try to arrange things close together that way I'm not dripping resin all over the place.

Very slowly I added a little bit of resin at a time. Remember, you can always add more. Trying to remove it is a pain in the ass and can get quite messy. When everything was filled with the resin, I moved the cookie sheet to the laundry room (since it's out of the way) and will let the resin sit overnight to cure. Tomorrow: adding the magnets!

Wednesday, July 28, 2010

Fridge Flair Magnets Tutorial: Step One - Gather Your Goods

It's tutorial time! Part One anyways.
Gather your goods.

The following is a list of things you will need to make bottle cap magnets like you see above.

Bottle caps. Duh. I get mine from local restaurants. Just go up to the bar and ask for a bag. Most places will gladly hand them over as they just throw them out anyways.

Oh yeah, make sure you wash and dry them when you get them home.
Unless you're going for the whole beer scented magnet thing.

I use Easy Cast for my resin. By all means, if you find one you like better please use that. I find the Easy Cast is well, easy to use. Just pour equal amounts of both the primer and hardener, mix and let set.

Love this stuff! Super strong. Kinda smelly. Amazing hold.

Initially I started off using the rolls of magnet tape and found out they don't hold very well. I switched over to the small round magnets and won't be going back anytime soon.

1" craft punch. I use this to punch out digital tiles and cardstock.

A mug. An old one preferably. I use this to mix my resin in.

Glitter glue. Comes in almost every color you can imagine. I use mine to line the inside rim of the bottle cap.

Wooden craft sticks. Great for mixing resin.

I hang on to my old medicine measuring caps to help measure out equal amounts of primer and resin. And getting the right amount is key to having your resin set correctly.

Digital tiles. Go for the 1" ones. You can find all kinds on Etsy. Just do a search for them.

Stickers. Any and all kinds. Just remember that the inside area of the bottle cap is 1" so you'll probably want to stay on the small size.

Most of the supplies I purchase at Michaels or Hobby Lobby. You can really find them just about anywhere. Also, you don't have to use exactly what I'm using. It's just a suggestion. :)

Stay tuned in this weekend and I'll be posting part two of the tutorial, Putting It All Together.

(All images via Google images.)

Tuesday, July 20, 2010

Stay Tuned!

I've had quite a few questions about how I make my Fridge Flair magnets so I've decided to make a step by step tutorial that will be featured some time next week!

I know a lot of crafters would scoff and say, "I'm not giving away my crafting secrets!" but I'm all for it. After all, how are you going to learn if no one is willing to teach you?

I'll be doing 2 different types (cardstock with stickers and photo tiles with glitter)

They're super easy to make and also very low in cost. I think the most expensive thing would be the magnets. Trust me, you want to invest in some good ones. But more on that later :)

So if you'd like to follow along, stay tuned!

Friday, March 26, 2010

Flower Brooches From Jen Renee!


The other day, Jen posted this wonderful tutorial on how to make flower brooches from extra bits of fabric you have left over (or even from an old tee shirt you don't wear anymore.) And let me just say, I LOVE LOVE LOVE! these. Kinda makes me want to rummage around my closet and start cutting circles of fabric out of everything. Anyways, thank you Jen for sharing!
Related Posts Plugin for WordPress, Blogger...