Wednesday, November 30, 2011

DIY Initial With Buttons


This cute little project takes no time at all to throw together and can be made for just a few dollars, or even with items you have around the house. 

If you remember my post about Nana's buttons and fabric that I scored, you'll know where all of these buttons came from. I purchased the cardboard J at Hobby Lobby for under $2, I believe. 

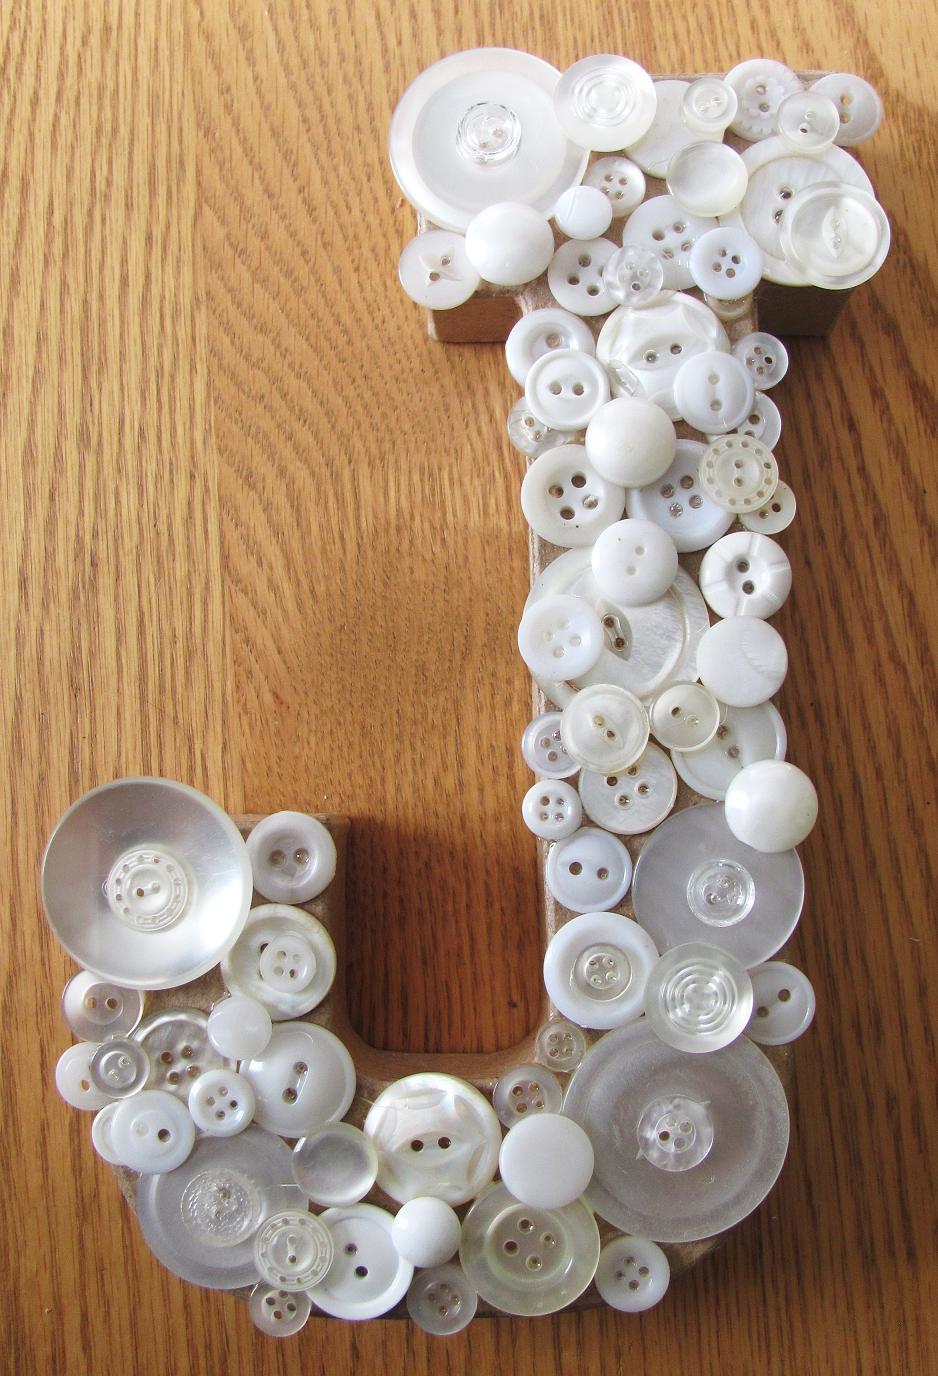
I wanted to make a solid white initial so I pulled out all of the white buttons and divided them by size; small, medium and large.


Using my E-6000, I glued down the large buttons randomly. I gave them a few minutes to dry and started adding medium size buttons and then the small. Again, letting them dry in between. There is no right or wrong way to arrange your buttons. I found adding the larger ones first helps cover more of the cardboard. 

If you don't feel like buying a premade initial, you can easier print a letter out, trace it onto a piece of cardboard (Hell, the cereal box would work), cut it out and use that. I plan on making another one, an L, and I'll probably end up using all different colors.


Note: I used the E-6000 because I noticed that regular Elmer's glue just wasn't holding the buttons as well as I wanted it to. Feel free to use the adhesive of your choice. You could even use fabric to cover your initial and then add buttons. Totally up to you!

I'd love you see some of your designs so post your links below!

Monday, November 28, 2011

Gearing Up


I have sadly been neglecting my little blog the past few weeks while gearing up for the upcoming holiday season. The good news is that I've gotten a crapload of stuff accomplished. Ordered boxes for my soaps, labels, new lip balm tubes, labeled said boxes, created holiday packs, researched arts & craft fairs, made about 100 coasters and managed to score some awesome Black Friday deals. 

I hope everyone had a wonderful Thanksgiving and stuffed themselves silly. I know I did! 

Don't forget about our Holiday Soap Trio giveaway, as it ends in only a few days. I'll be posting the winner this week! Once the weather turns and I'm able to get some good lighting I'll be posting photos of all of my new goodies. Can't wait for you guys to see them all :)

Saturday, November 5, 2011

IKEA, Sweet IKEA

Source: babble.com via Rachel on Pinterest

I'm heading home next week for a visit. Aren't I quite the little globetrotter? One of the things I'm looking forward to the most, besides visiting friends and family, is a trip to IKEA! I wish I could just move in. Think they would mind?


Source: google.com via Amber on Pinterest


Wednesday, November 2, 2011

A Thousand Words: Chicago


Chicago was so fun this weekend! I got there Friday afternoon and after hitting up Starbucks, Steph and I went to see The Rum Diary. Not quite what I expected but funny nonetheless.


 Saturday night we took the train into the city to go to Steph's friends after wedding party. Beware of mixing alcohol and men with really nice beards!


We had planned on heading back into the city on Sunday but didn't get up until after 11am so I ended up roasting a chicken and we watched reruns of The Sing Off. It was a rainy day so this was the perfect remedy.


Steph and I got up super early (i.e., before 7am) and took the train in. Our first stop was the Field Museum. We got in free because Steph is a IL resident. Woo hoo free stuff! I loved the Egyptian exhibit (of course I would) and kept remarking on how "real" the animals looked. What I really meant was how "alive" they seemed. We ventured out to find the Buckingham Fountain (it was shut off) and find the Chicago Bean (we didn't) so we headed over to Navy Pier and snagged some dogs and beer at half price. And free chips. Yay free chips! Next time I visit we will definitely have to spend more than a day on the city cause there's way too much stuff to do in one day. All in all, it was great to visit again and hang out with my bestie :)


Related Posts Plugin for WordPress, Blogger...