Showing posts with label diy. Show all posts

Wednesday, November 30, 2011

DIY Initial With Buttons


This cute little project takes no time at all to throw together and can be made for just a few dollars, or even with items you have around the house. 

If you remember my post about Nana's buttons and fabric that I scored, you'll know where all of these buttons came from. I purchased the cardboard J at Hobby Lobby for under $2, I believe. 

I wanted to make a solid white initial so I pulled out all of the white buttons and divided them by size; small, medium and large.


Using my E-6000, I glued down the large buttons randomly. I gave them a few minutes to dry and started adding medium size buttons and then the small. Again, letting them dry in between. There is no right or wrong way to arrange your buttons. I found adding the larger ones first helps cover more of the cardboard. 

If you don't feel like buying a premade initial, you can easier print a letter out, trace it onto a piece of cardboard (Hell, the cereal box would work), cut it out and use that. I plan on making another one, an L, and I'll probably end up using all different colors.


Note: I used the E-6000 because I noticed that regular Elmer's glue just wasn't holding the buttons as well as I wanted it to. Feel free to use the adhesive of your choice. You could even use fabric to cover your initial and then add buttons. Totally up to you!

I'd love you see some of your designs so post your links below!

Friday, October 14, 2011

DIY Resin Candle Holder

This week's DIY is a make it yourself resin candle holder. You don't have to stick with the cylindrical shape that I've used. The square and bowl shaped holders would work just as well. The best thing about this project is that it takes no time at all to make and you only need a few supplies.

Supplies:
2 glass containers (one small enough to nest in the other)
E-6000 or any other strong glue
Resin (I ended up using about 12oz.)
Any type of filler

Remember, you want your filler to be light enough in color for the candle to show through. I'm using the Agate I collected this summer in Alaska. Glass drops would work as well and they come in a wide variety of colors. I plan on making one with sea glass once I manage to find enough.

The first thing I did was adhere the smaller glass inside the larger one using a good size dollop of the E-6000. Make sure it's centered, press firmly and wait a few minutes to it to take hold.

This gives me about 3/4" - 1" of space on all sides.

Slowly start adding your filler. I covered the center with my hand to prevent rocks from falling into the smaller glass.

It's not quite up to the top but I'm all out of Agate. And I'm ok with that :)
Remember, it doesn't have to be perfect!

I chose to use a paper cup to mix the resin not only because I can just throw it away when I'm done but I can also squeeze the top sides together to get a more direct pour.

Once your resin is mixed slowly start to pour the resin over your filled between the two glass containers. Don't worry if you end up getting some on the glass. Just make sure you wipe it off with a paper towel when you get done pouring.

It takes a while for the resin to make its way down to the bottom. I actually ended up doing 4 small pours with about 5 minutes between each.

The resin will eventually settle at the bottom. I kinda like the look of the Agate that the resin has passed through.

And the finished product. Place your container somewhere it won't get knocked over and let sit 24 hours to harden. You can drop in a tea light candle (or larger, depending on your container)
I can't wait to see how this looks in the dark. I'll try to take some photos tonight.

Thursday, March 31, 2011

The Solution For All Those Buttons

A few posts back I talked about the fabric/button collection that was my Nana's. I had no idea what on earth I was going to do with that many buttons. But Design Sponge came to the rescue. *Thanks guys!*

If you haven't already checked out their site, head over there for some awesomeness. Seriously. Awesomeness. Especially the DIY section. There's probably 10 things I bookmarked to try. What you see in these photos was one of them. Download the template. Print on card stock. Attach buttons. Frame. Done. Awesomeness.

I'm planning on swinging by Walmart to pick up some contrasting embroidery thread before work tonight and possibly some frames.

And now, feast your eyes on these...


Has anyone else tried any of the Design Sponge DIY projects?

Sunday, January 30, 2011

Giveaway Reminder!


Hey all!

One more day for the Cold Process Soap Giveaway!


And to all my DIY followers, I will be extending the DIY giveaway until February 13th. Winner will be announced on Valentine's Day.

Saturday, January 15, 2011

Be My DIY Valentine

My fellow Etsians never cease to amaze me. Look how lovely this DIY Valentine treasury is. It was created by the wonderful atreething over on Etsy. Cynthia makes beautiful family tree prints, which are right up my alley. Genealogy anyone?

Friday, January 14, 2011

DIY Valentine Button Heart Card

Wanna make a super cute handmade card for your love for Valentine's Day? Good, cause that's what I'm teaching today. Grab your supplies (card stock or blank card, pencil, glue and an assortment of buttons in hues of red and pink)

Step One: Trim and fold your card stock down to the size you want. If you're using a blank card, you're all set.

Step Two: Using a pencil, very lightly draw a heart outline.

Step Three: Arrange the buttons along the heart line. I like to do this to see how many I'll need and I'm also able to rearrange them if I don't like the placement. Or you can just wing it for that I'm-an-artist-and-I-don't-care look. (No judgement here)

Step Four: Glue all the buttons down. Let dry overnight.

Step Five: Uh, you're done dude!

Happy Crafting!

Thursday, January 13, 2011

DIY Ceramic Tile

*Please know that I am apologizing ahead of time for the photos. I didn't realize how dark they were until after I had finished taking them. Doh!*

It's really quite easy and very inexpensive to make these cute little ceramic tiles. You can use them as a coaster or even a trivet.

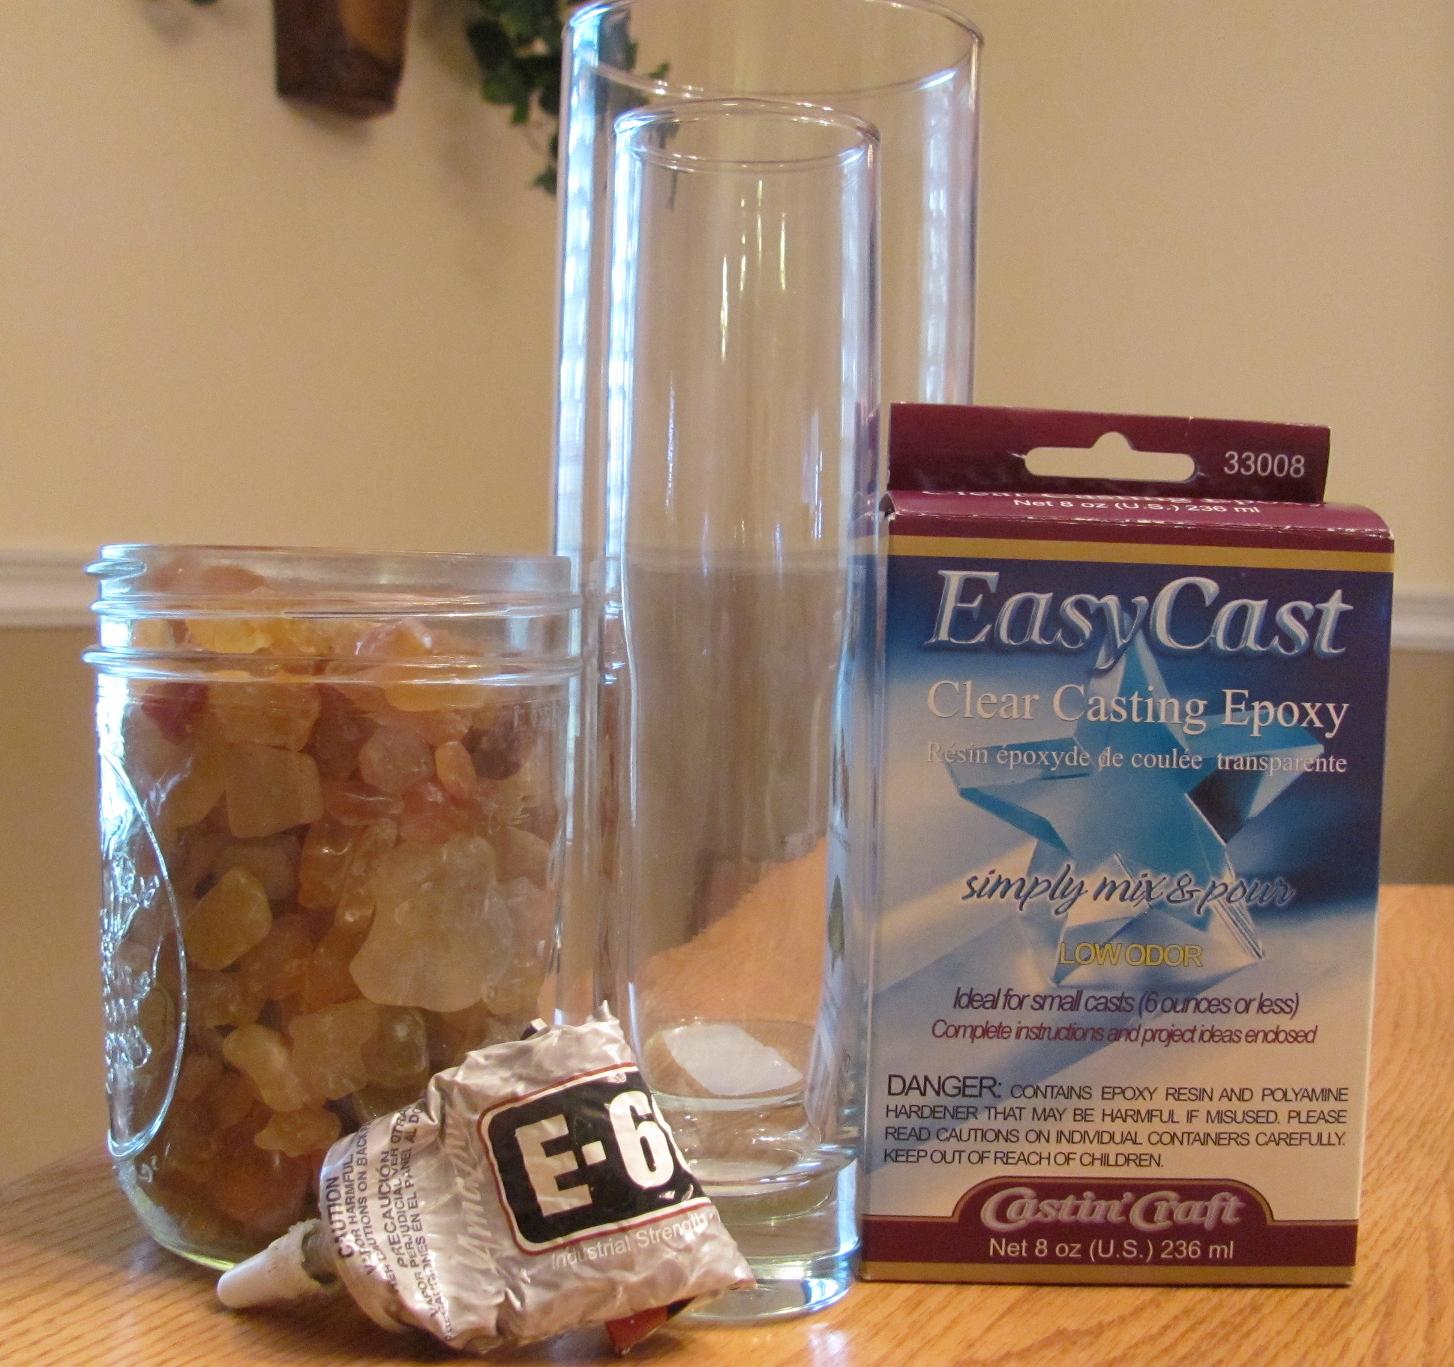
Here's what you'll need for supplies:

Card stock or paper
White ceramic tiles (4.25x4.25)*
Mod Podge
Resin or clear acrylic sealer
Stickers or ephemera

*(I purchased mine at Lowes for $0.19 each)

Tools:

Paper trimmer
Paint brush
Sponge Brush

And now for the fun part!

Step One: Wash off all of your tiles and dry well. They may not look dirty but you still want a nice clean surface for the paper to stick to.

Step Two: Cut your paper to fit the tile. I cut mine at 4 1/8".

Step Three: Using your paint brush, paint a very thin layer of Mod Podge onto the tile. I like to get mine so it's barely wet. From past trial and error episodes I've noticed if you use too much the paper will absorb too much of the glue and you wind up with bubbles under it. Not too pretty!

Step Four: Carefully align your paper on the tile, making sure to press down on the edges to ensure a proper seal. Let dry - usually takes a few minutes.

Step Five: Continue adding thin layers of Mod Podge to the paper, letting it dry after each layer. I usually add 3-4 coats before I start to add my stickers.
*Make sure you coat the entire piece of paper and over lap some onto the tile. The reason for the heavy coverage is so that when you add your resin or acrylic sealer on top, it wont seep through and discolor your paper. (Again, I learned this by trial and error. Mostly error.)

Step Six: If you haven't already figured out how you would like to arrange your stickers and whatnot, you can do so at this time. Or even as your glue is drying. If you plan on layering things, like I have done pay close attention to make sure everything will fit and look nice once it's on the tile. I usually take a blank tile and arrange everything to see how it will look.

Step Seven: Add your embellishments. Stickers, die-cuts, whatever. Mod Podge them down and add a thin layer on top as well. Let dry and add multiple coats to the whole thing as well. (Just like we did with the paper)

I like to add one element at a time and make sure it is stuck down well and has a few coats over it before I add the next, especially if I plan on overlapping things.

If you've never used Mod Podge before, it dries clear. I promise.

Here are my two Mod Podged coasters. They are just waiting on resin.

As you can see around the embellishments, the Mod Podge isn't quite dry and still has a milky appearance.


Step Eight: I usually let my tiles sit overnight before I seal them with resin or sealer. When I made all of the coasters for Christmas gifts, I ended up using the acrylic sealer but I don't think I will use it in the future. It smelled horrible and gave me a headache while I was using it. And days later it still threatened to asphyxiate the gift recipients. Not cool. Good thing we all work in the ER ;) Anywho, protect your area with newspaper, wax paper, etc. If you're going to use the spray sealer, follow the directions on the can. It will take several coats! If you plan on using the resin, mix according to the directions and use the sponge brush to coat the tile.

Step Nine: Let dry overnight and you're good to go!

You can also buy those small felt stickers to put on the bottom of the tile so they don't scratch or mark up your furniture, although I had no issues with mine.

Happy Crafting!

I will be posting the final end result pictures on tomorrows DIY post.
If you have any questions, please feel free to leave a comment!

Also, don't forget that I'll be giving these two coasters away at the end of the month.

Friday, January 7, 2011

DIY Week! And Giveaways!!!

I'll be heading home for a visit next week and while I'm gone I will be scheduling a series of DIY crafts for you to enjoy. I'll be showing you how to make the following items:

♥ Custom Ceramic Tile Coaster ♥
♥ Button Heart Card ♥
♥ Felted Soap ♥
♥ Paper Bag Mini Scrapbook ♥
♥ Set of 3 Glitter Robot Magnets ♥

And the best part about DIY week is the GIVEAWAYS!!!

To enter the contest, leave a comment here or on any of the DIY posts next week listing some project you would like explained step by step. This year I think I'd like to feature a DIY project once or twice a month and I need some ideas!

Follow our blog, Tweet or blog this giveaway for an extra entry.

There will be 5 winners! (One for each of the items listed above)

I will be drawing names January 31st, along with the winners of the soap giveaway.

Stay tuned and good luck!

Sunday, December 19, 2010

Update: Custom Ceramic Tile Coasters

As promised, better photos of the tiles. They still need a coat of resin and some felt on the back but I love them already. Super, super easy. Super inexpensive.


Saturday, December 18, 2010

Custom Ceramic Tile Coasters

First and foremost, I apologize for this photo. I took it with my phone. It's 02:30 and since there is no sun out, it'll have to do. (I'll take some better ones tomorrow.) The colors are super vivid and pop out at you.

I've been trying to think of something inexpensive to make the girls at work for Christmas. This is only one item that will be going into the gift bags I will be making.

Super, super easy. I went to Lowes the other day and purchased some 4.25" white ceramic tiles. I was looking for unglazed ones but couldn't find any. Tonight I cut 4" square pieces of cardstock and paper and Mod Podged them onto each tile. I used a very thin layer since I didn't want the paper to warp. I then glued down some letters that I had from one of my scrap pads. So far I added 2 additional coats of Mod Podge on top but tomorrow I'll probably add another 2-3 layers. Once that is all dry I'll paint a thin coat of resin all over the top to seal it.

These would work great for any type of gift (holidays, birthdays, etc.) I have a habit of keeping my movie ticket stubs so I think I'll end up making a set with those.

Happy crafting! :)

Friday, March 26, 2010

Flower Brooches From Jen Renee!


The other day, Jen posted this wonderful tutorial on how to make flower brooches from extra bits of fabric you have left over (or even from an old tee shirt you don't wear anymore.) And let me just say, I LOVE LOVE LOVE! these. Kinda makes me want to rummage around my closet and start cutting circles of fabric out of everything. Anyways, thank you Jen for sharing!
Related Posts Plugin for WordPress, Blogger...